Reviewing Applications
When a prospective wholesale buyer submits the registration form, their application lands in the Registrations queue. This page is about what to do next.
The queue
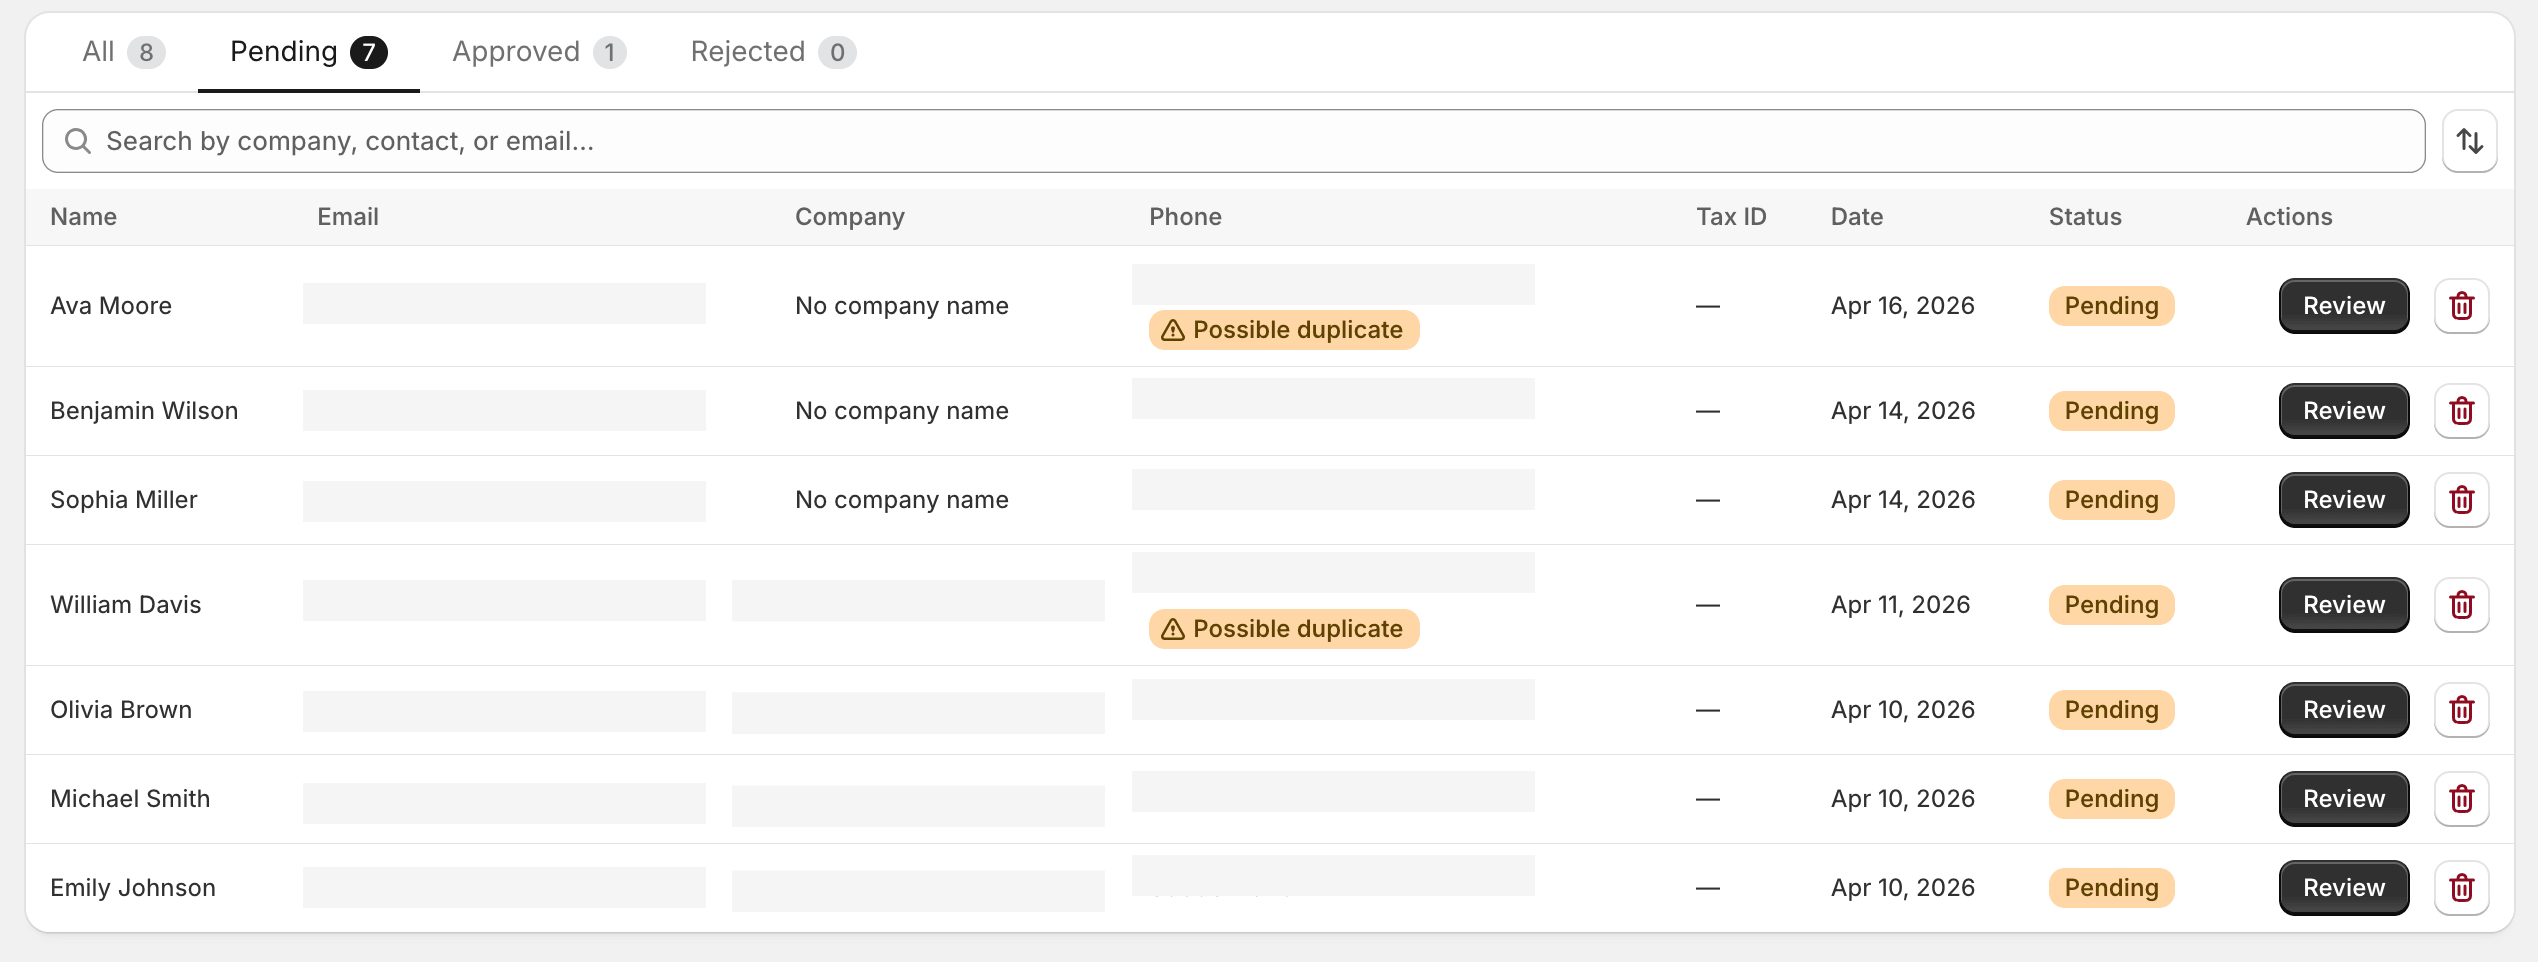
Section titled “The queue”Open Registrations in the sidebar. The list is sorted by submission time, newest first. Each row shows:
- The applicant’s name and email
- Company name (if collected)
- Submitted-on date and time
- A status pill: Pending, Approved, or Rejected
By default the queue shows everything. Use the status filter at the top to show only pending applications when you’re working through a batch.
Reviewing a submission
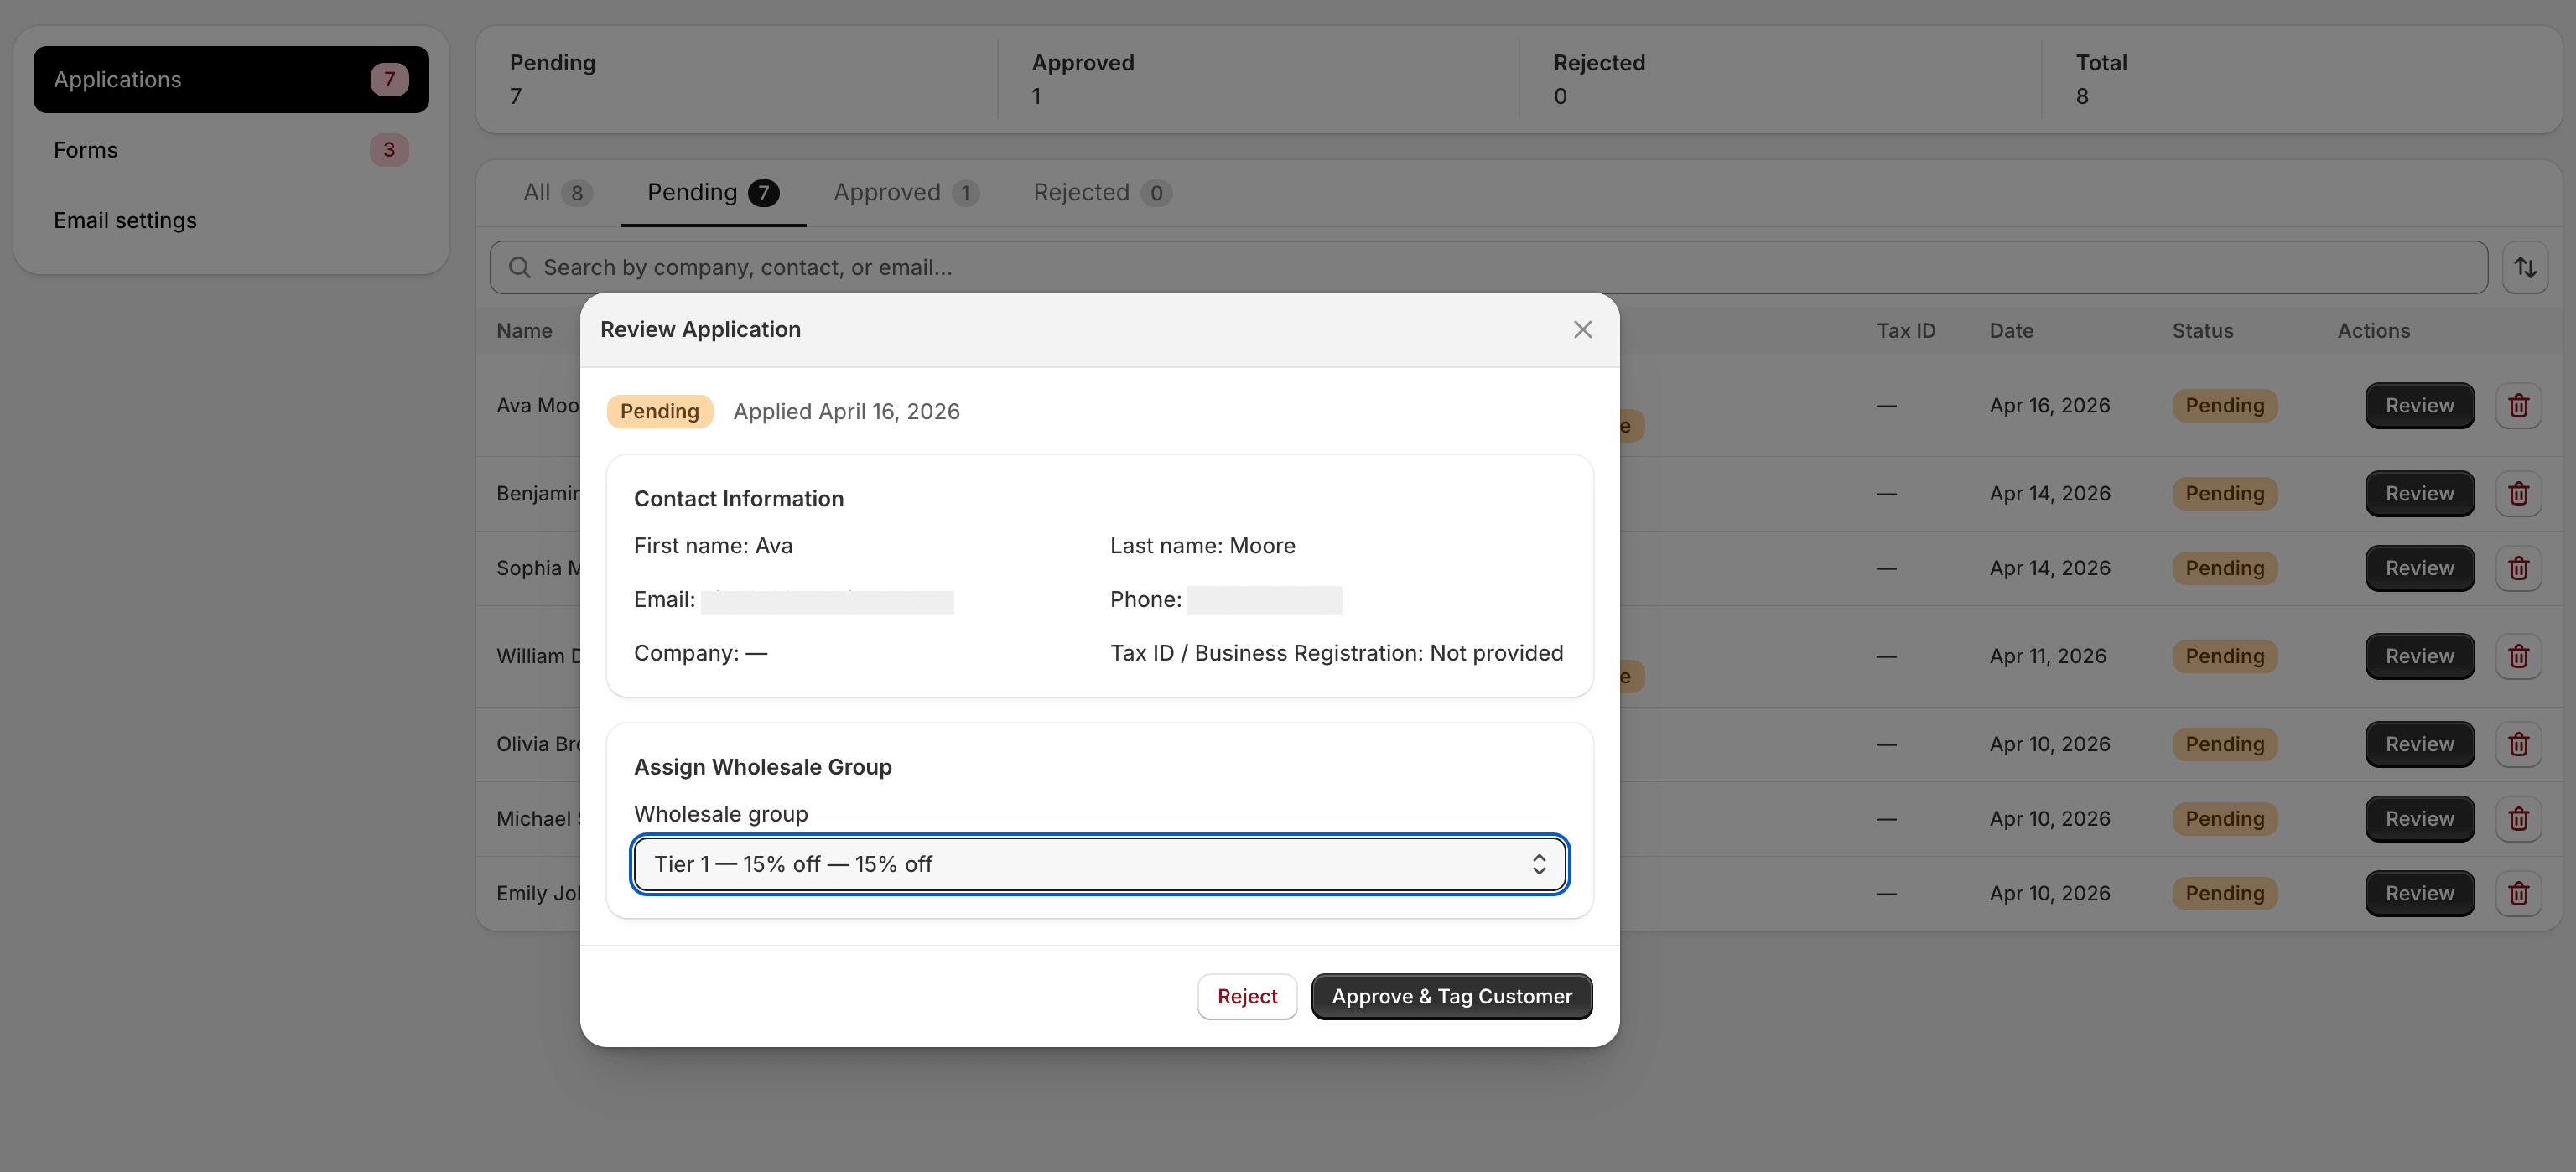
Section titled “Reviewing a submission”Click any row to open the review panel. You’ll see:
- All the fields from the form, grouped by built-in vs. custom
- The submission timestamp
- Whether a Shopify customer record already exists for this email
- The form the application came from (useful when you have multiple forms running)
Take a moment to confirm the basics before deciding:
- Is the email plausibly a business address? (Disposable-email domains like @mailinator.com are a red flag.)
- Does the company name check out? A quick web search for the business and email domain catches most fakes.
- For regulated categories, does the tax ID or reseller permit look valid?
Approving
Section titled “Approving”- Click Approve.
- Choose which group to add the buyer to. Newly-approved buyers can go into any active group; the dropdown shows them all.
- Confirm.
What happens next:
- The applicant is added to the group you picked. The wholesale customer tag is applied to their Shopify customer record (creating the record if one didn’t exist yet).
- The submission’s status flips to Approved.
- The approval email template is sent to the applicant. Customise the wording in Email Templates.
The discount applies on their next sign-in to checkout.
Rejecting
Section titled “Rejecting”- Click Reject.
- Optionally add a reason. The reason is included in the rejection
email if your template uses the
{{rejection_reason}}variable. - Confirm.
What happens next:
- The submission’s status flips to Rejected.
- The rejection email template is sent.
- No Shopify customer record is created or modified.
Rejecting is not destructive — the application sticks around in the queue. You can reverse a rejection by opening the row and clicking Approve instead, which moves the application straight into the chosen group.
When to reject vs. delete
Section titled “When to reject vs. delete”If an application is genuine but you don’t want them in your wholesale program, reject it. The applicant gets a polite email and you keep a record.
If the application is obvious spam (gibberish fields, throwaway emails), delete it from the kebab menu. Deletion is permanent and doesn’t trigger an email.
Bulk actions
Section titled “Bulk actions”Right now the queue handles applications one at a time. If you’ve fallen behind and have dozens of identical-looking applications to approve, work down the queue with these keyboard shortcuts:
- Enter to open the highlighted row
- A to approve
- R to reject
- Esc to close the review panel
Bulk-select and bulk-approve are on the roadmap.
Common scenarios
Section titled “Common scenarios”The applicant says they applied but I don’t see anything. Check the queue’s status filter — it may be set to Pending and the application may have been auto-rejected by a moderation rule (rare, but possible). Switch the filter to All.
I approved the wrong group. Open the customer in Customers, click the kebab menu, choose Change group. The wholesale tag swaps within seconds.
The approval email didn’t arrive. Check the customer’s spam folder first — Shopify-sent emails sometimes land there. If it’s missing, open the customer’s profile in Shopify admin and check that the email address is correct. You can also re-send the approval email from the review panel using Re-send email.
Same person applied twice. Treat the duplicate as informational — approve once, delete the duplicate.
What’s next
Section titled “What’s next”- Email Templates — make the approval and rejection messages your own.
- Translations — translate forms and emails for multi-locale stores.