Form Builder
The form builder is where you decide what information you collect from prospective wholesale buyers. Every form has a fixed top section (heading + description), a list of fields you arrange yourself, and a success state that’s shown after submit.
If you’re new to forms, Registration Forms covers the end-to-end flow first. This page focuses on the builder itself.
Open the builder
Section titled “Open the builder”- Open Registrations → Forms and click the form you want to edit. (If you haven’t created one yet, click Create form, then open it.)
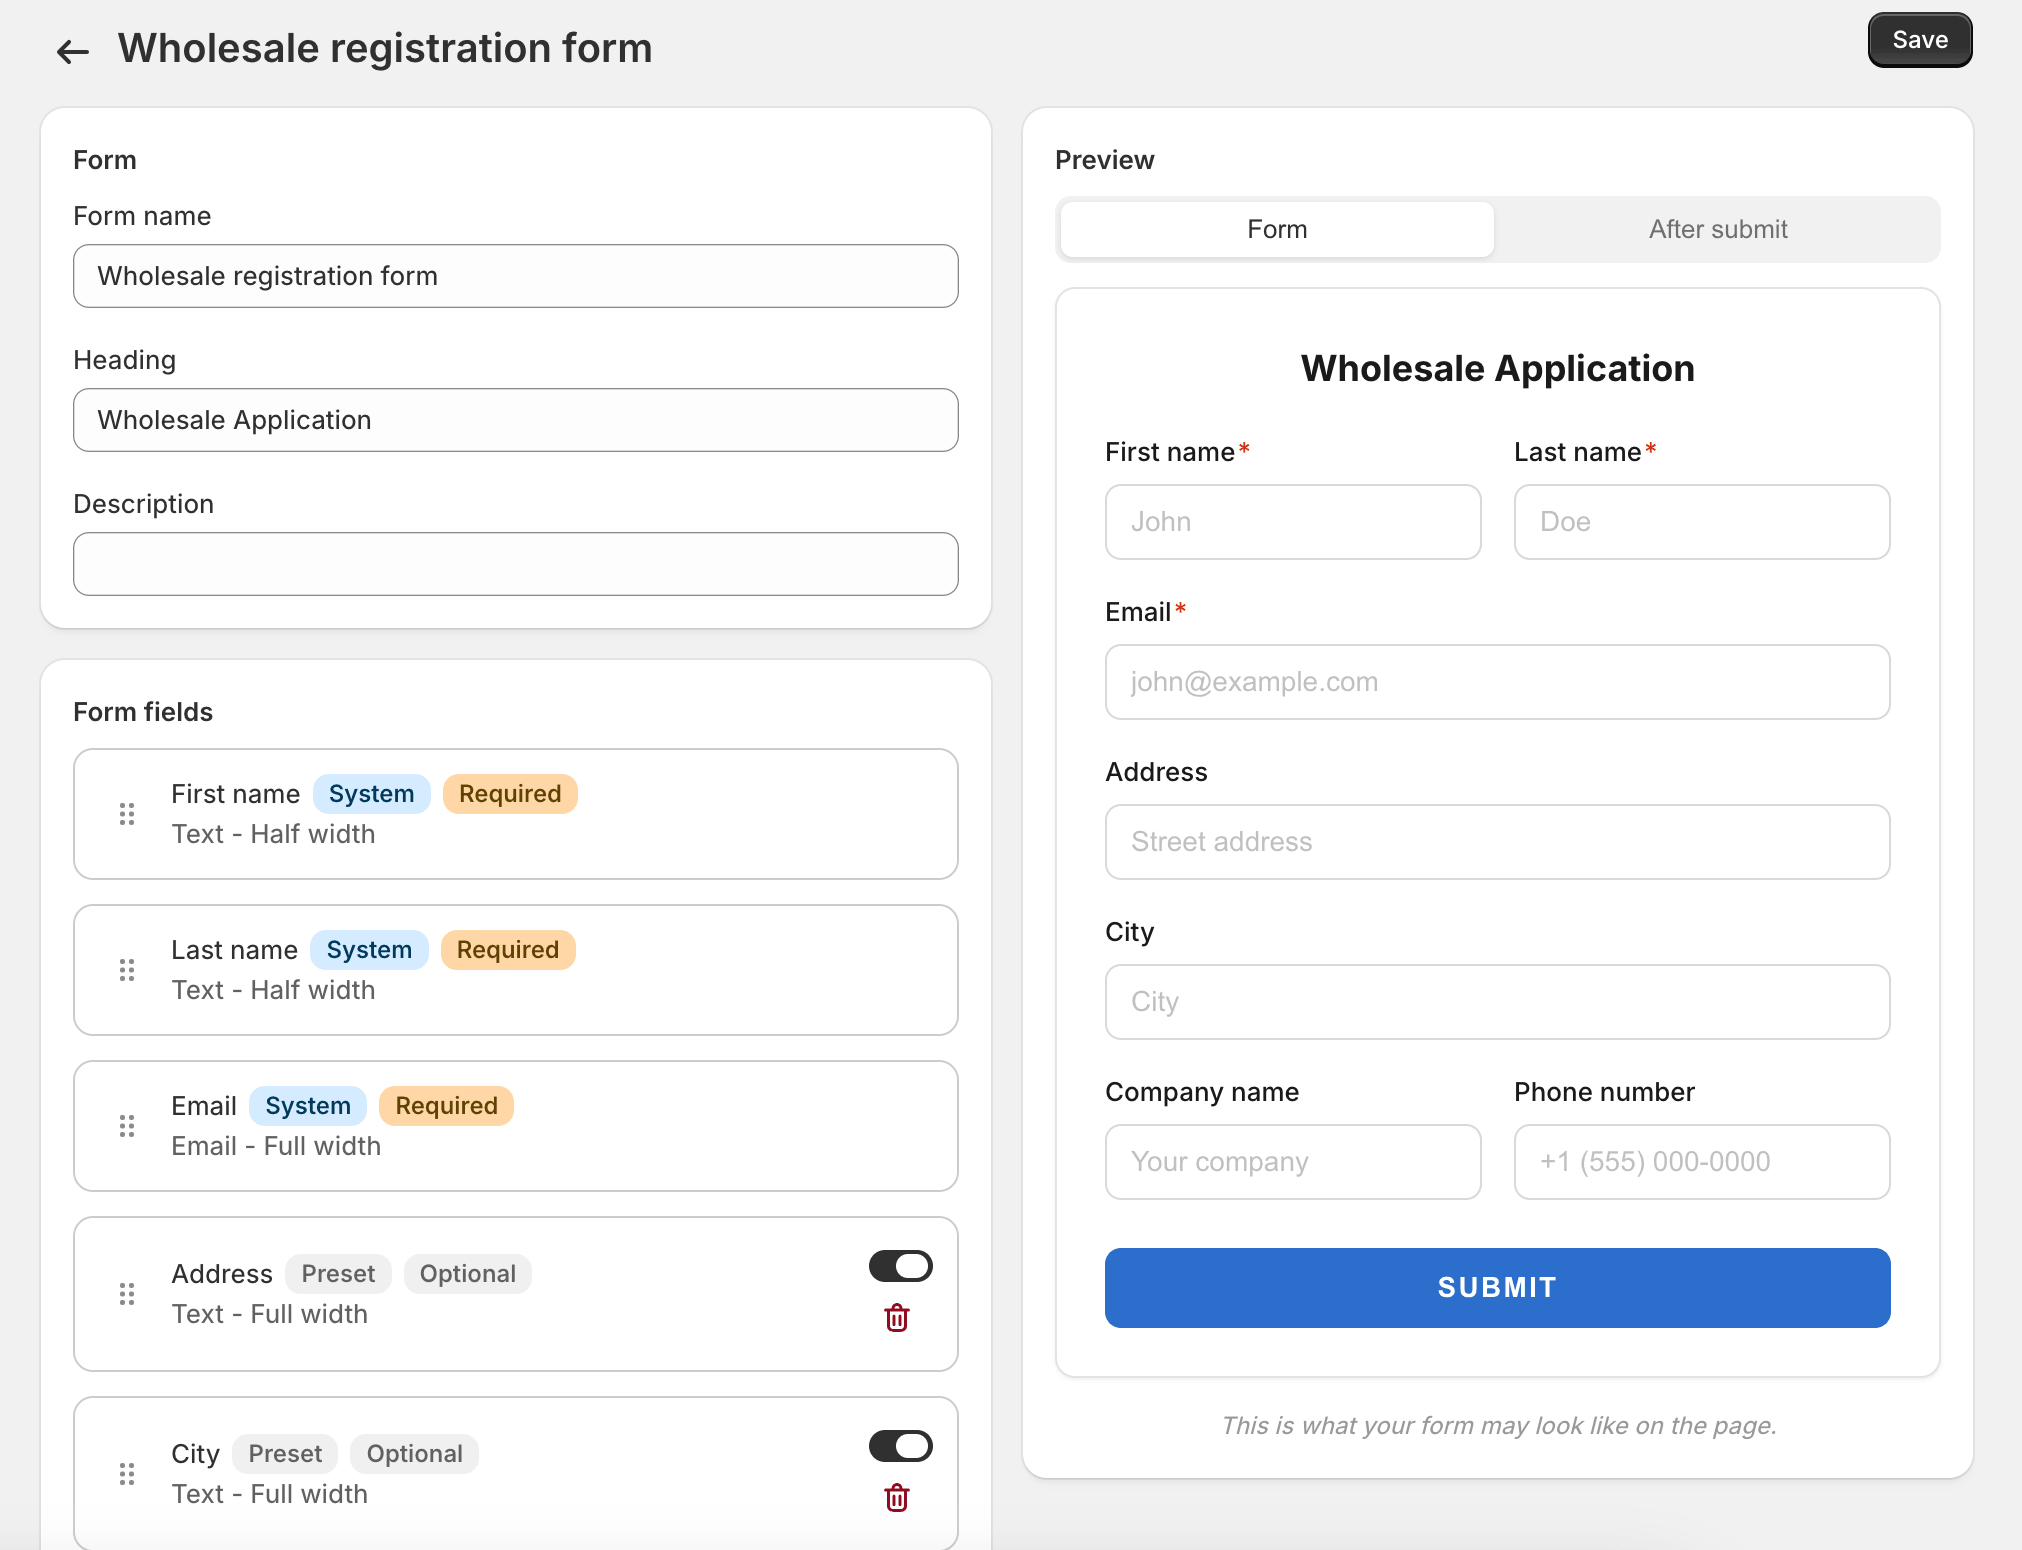
- The builder opens with three default fields — First name, Last name, Email — plus the form’s heading and description above.
Arrange the fields
Section titled “Arrange the fields”The form fields render in the order you list them. Drag a field by its handle to reorder; click a field to open its settings; click Remove to delete it.
You don’t need to save while reordering — the order is committed when you click Save at the top of the page.
Built-in fields
Section titled “Built-in fields”Some fields the form always supports. They’re more than just labels: they’re surfaced in the approval screen, in email templates, and in CSV exports. Use them whenever the data fits.
- First name, Last name, Email — required, can’t be removed
- Company name — optional but commonly required for B2B
- Phone — optional
- Tax ID — optional; ask for it when your accountant needs it on file before approving wholesale buyers
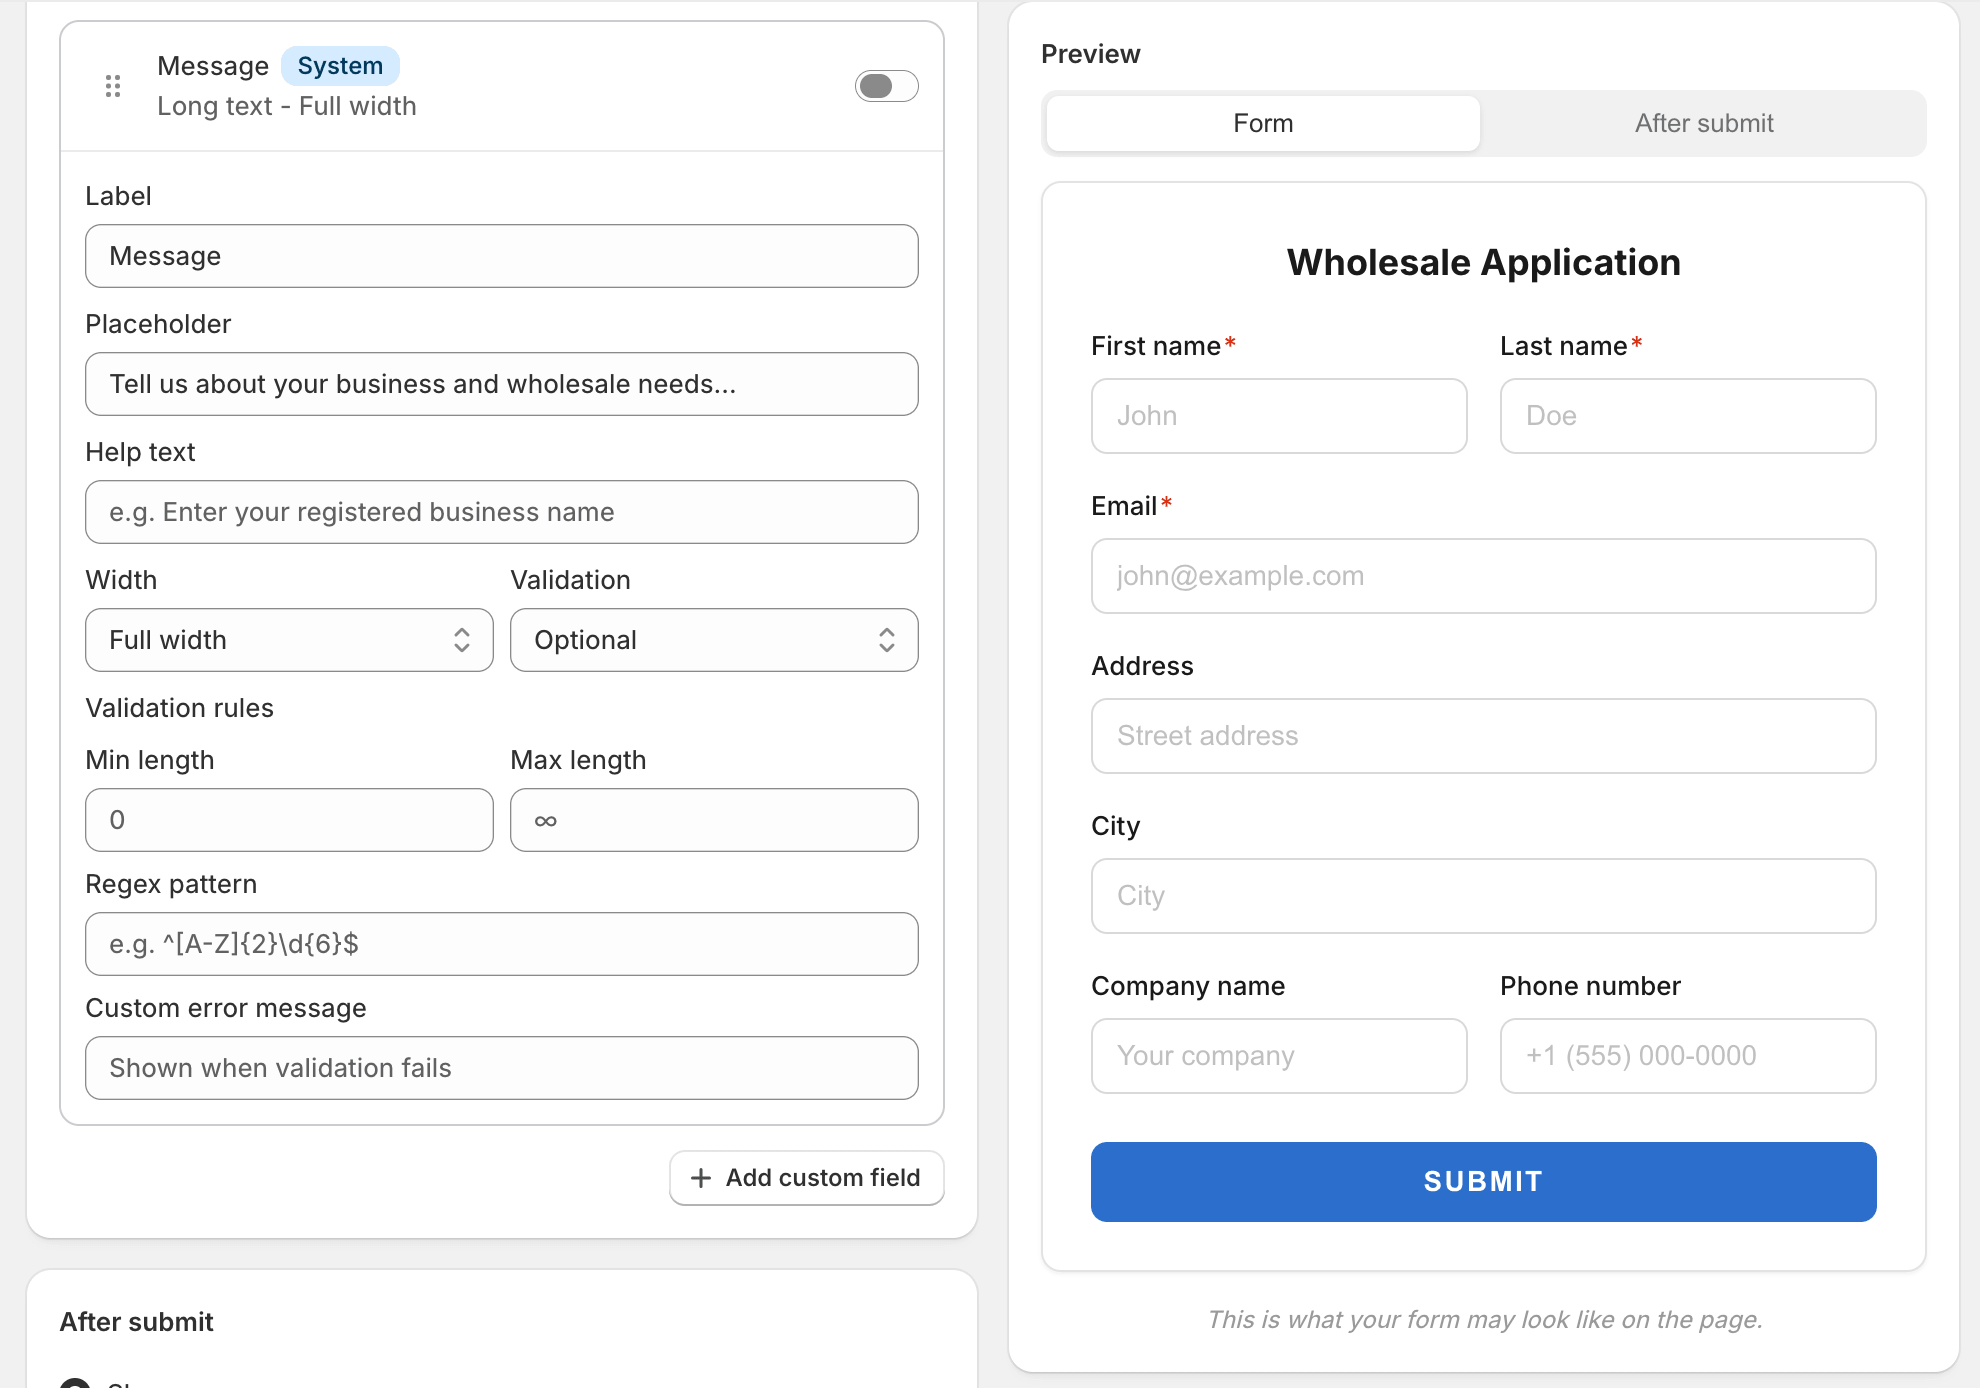
- Message — a free-form textarea where buyers can introduce themselves or note anything special
Custom fields
Section titled “Custom fields”If a built-in field doesn’t fit, add a custom field. Custom fields can be:
- Short text — single line, e.g. “Website URL”, “Reseller permit number”
- Long text — multi-line, e.g. “Tell us about your business”
- Select — a dropdown with the choices you provide
- Checkbox — yes/no, useful for “I agree to the wholesale terms”
- Number — for things like “Years in business”
Each custom field lets you set:
- A label shown above the field
- A placeholder shown inside an empty field
- Help text shown beneath the field
- Whether the field is required
- For Select: the list of options
The heading and description
Section titled “The heading and description”Above the fields, you control three pieces of copy:
- Form heading — the bold title at the top of the form. Defaults to Wholesale Application. Change it if your program has a specific name (Trade Program, Pro Buyers, etc.).
- Form description — a short paragraph beneath the heading. Use this to set expectations: who qualifies, what happens after submit, how long approval typically takes.
- Submit button label — the text on the button. Defaults to Submit application.
Keep the description honest about timing. “We review applications within 1–2 business days” is much better than “Apply now for instant wholesale access” if you actually take a couple of days.
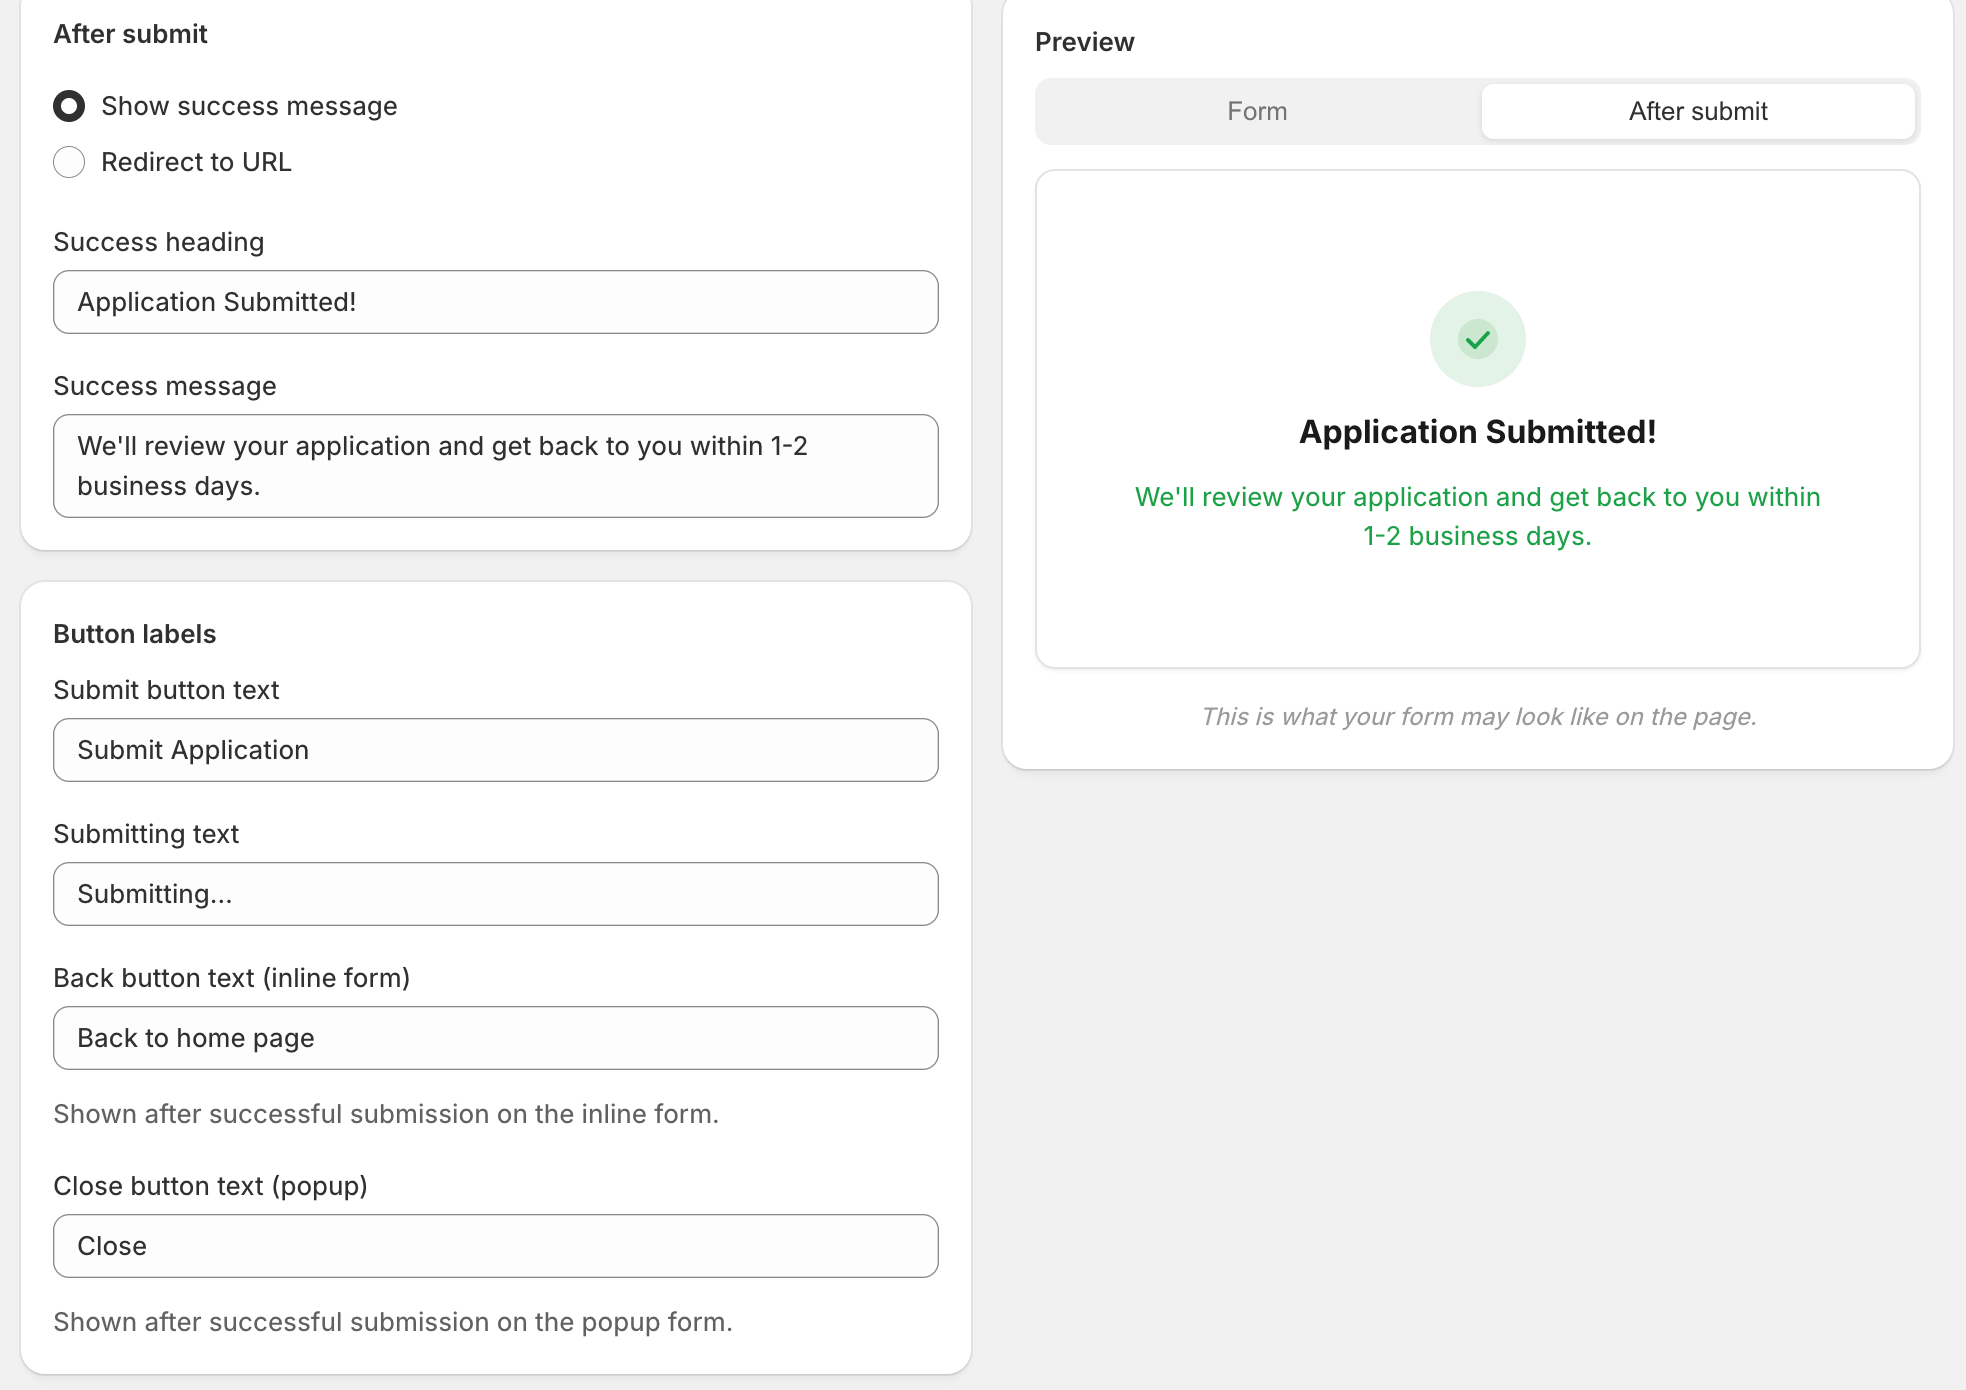
The success state
Section titled “The success state”After a buyer submits the form, the form area on the storefront is replaced with a success message. You configure it in two parts:
- Success heading — the bold confirmation, e.g. “Application received”.
- Success message — a paragraph telling the buyer what to expect next.
Alternatively, set After submit → Redirect and provide a URL — the buyer is sent to that page after submission. A common pattern is to redirect to a Thank you page that’s part of your storefront so it matches the rest of your site styling.
Styling
Section titled “Styling”The builder exposes a few colours so the form fits your theme:
- Submit button colour — defaults to your accent colour
- Error message colour
- Success message colour
Anything beyond colours (fonts, layout, spacing) inherits from your theme. The form is built to be unstyled by default so it picks up the typography and surface colours of whatever theme you’re using.
Validation rules
Section titled “Validation rules”Some validations are always on:
- Email must look like an email address
- Number fields only accept digits
- Required fields can’t be empty
You can’t add custom regex rules in v1. If you need precise validation (e.g. “Tax ID must be 9 digits”), use a Short text field with help text that says so, and validate again when you review the application.
Saving
Section titled “Saving”Click Save at the top of the page to publish your changes. The form on your storefront updates within a few seconds — buyers viewing the page when you save will see the new fields after a refresh.
Common patterns
Section titled “Common patterns”A few configurations we’ve seen work well:
- Bare-minimum form: First name, Last name, Email, Company name, Message. Five fields. Best for stores with a small wholesale program where you can chase missing info by email.
- Compliance-heavy form: Add Tax ID, Reseller permit number (custom short text), and a checkbox “I have read and agreed to the wholesale terms”. Better for regulated categories.
- Segmented intake: Add a Select field with options like Retailer / Distributor / Brand rep, then route applications to different groups based on the answer. Reduces back-and-forth.
What’s next
Section titled “What’s next”- Reviewing Applications — how to handle submissions once they start coming in.
- Email Templates — customise the approval and rejection emails.