Create Your First Group
Creating a group is short — the modal has five fields and most of them have sensible defaults. But each field has a downstream effect, so it’s worth knowing what you’re picking.
Open the Add Group modal
Section titled “Open the Add Group modal”- Open Groups in the app sidebar.
- Click Add group in the top-right corner.
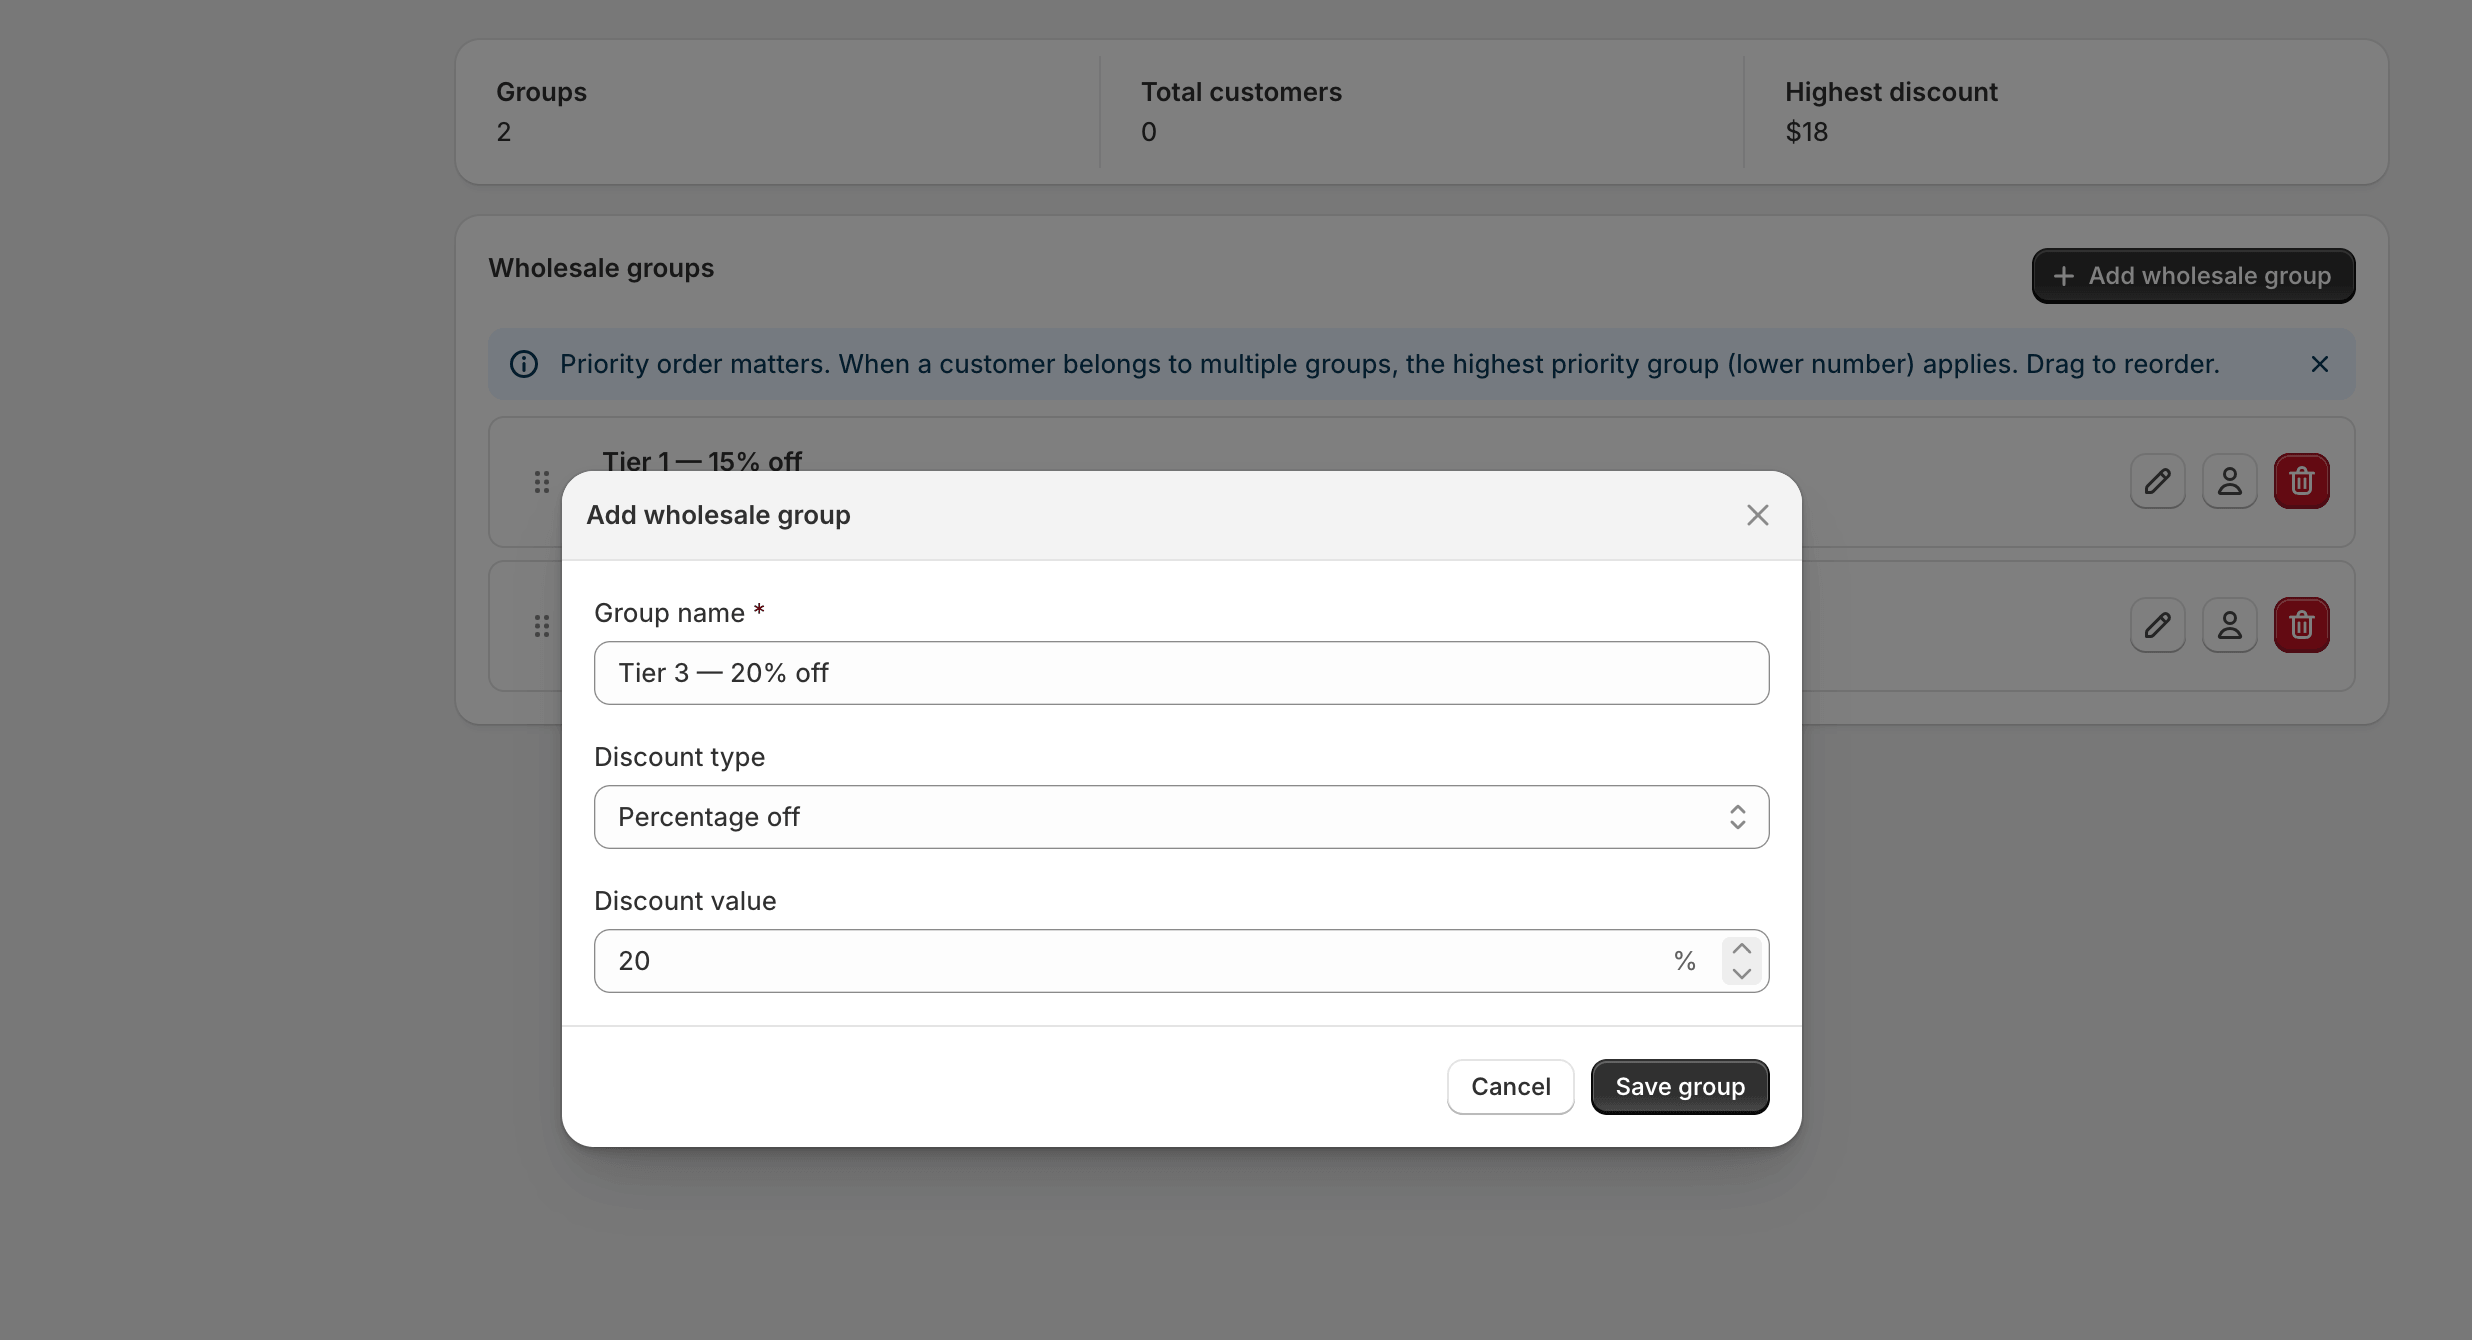
Fill in the fields
Section titled “Fill in the fields”The display name shown throughout the app. Free-form — pick something you and your team will recognise. Examples:
- Tier 1 — 15% off
- Distributors
- Brand reps (no shipping fees)
The name is not shown to buyers anywhere on the storefront — it’s internal-only.
Discount type
Section titled “Discount type”Choose between two modes:
- Percentage — applies the same percentage off every product (e.g. 15%). Good when your wholesale prices follow a uniform markdown.
- Fixed amount — a flat currency amount off every product (e.g. $5 off). Almost nobody picks this for the baseline; per-product rules are usually a better fit. Use it only if it genuinely matches your pricing.
Discount value
Section titled “Discount value”A non-negative number. Validated client-side and again server-side; you can’t save a negative percentage.
For percentage discounts, the maximum is 100. For fixed-amount
discounts, the app caps at the product’s own price during checkout — a
buyer never sees a negative line price.
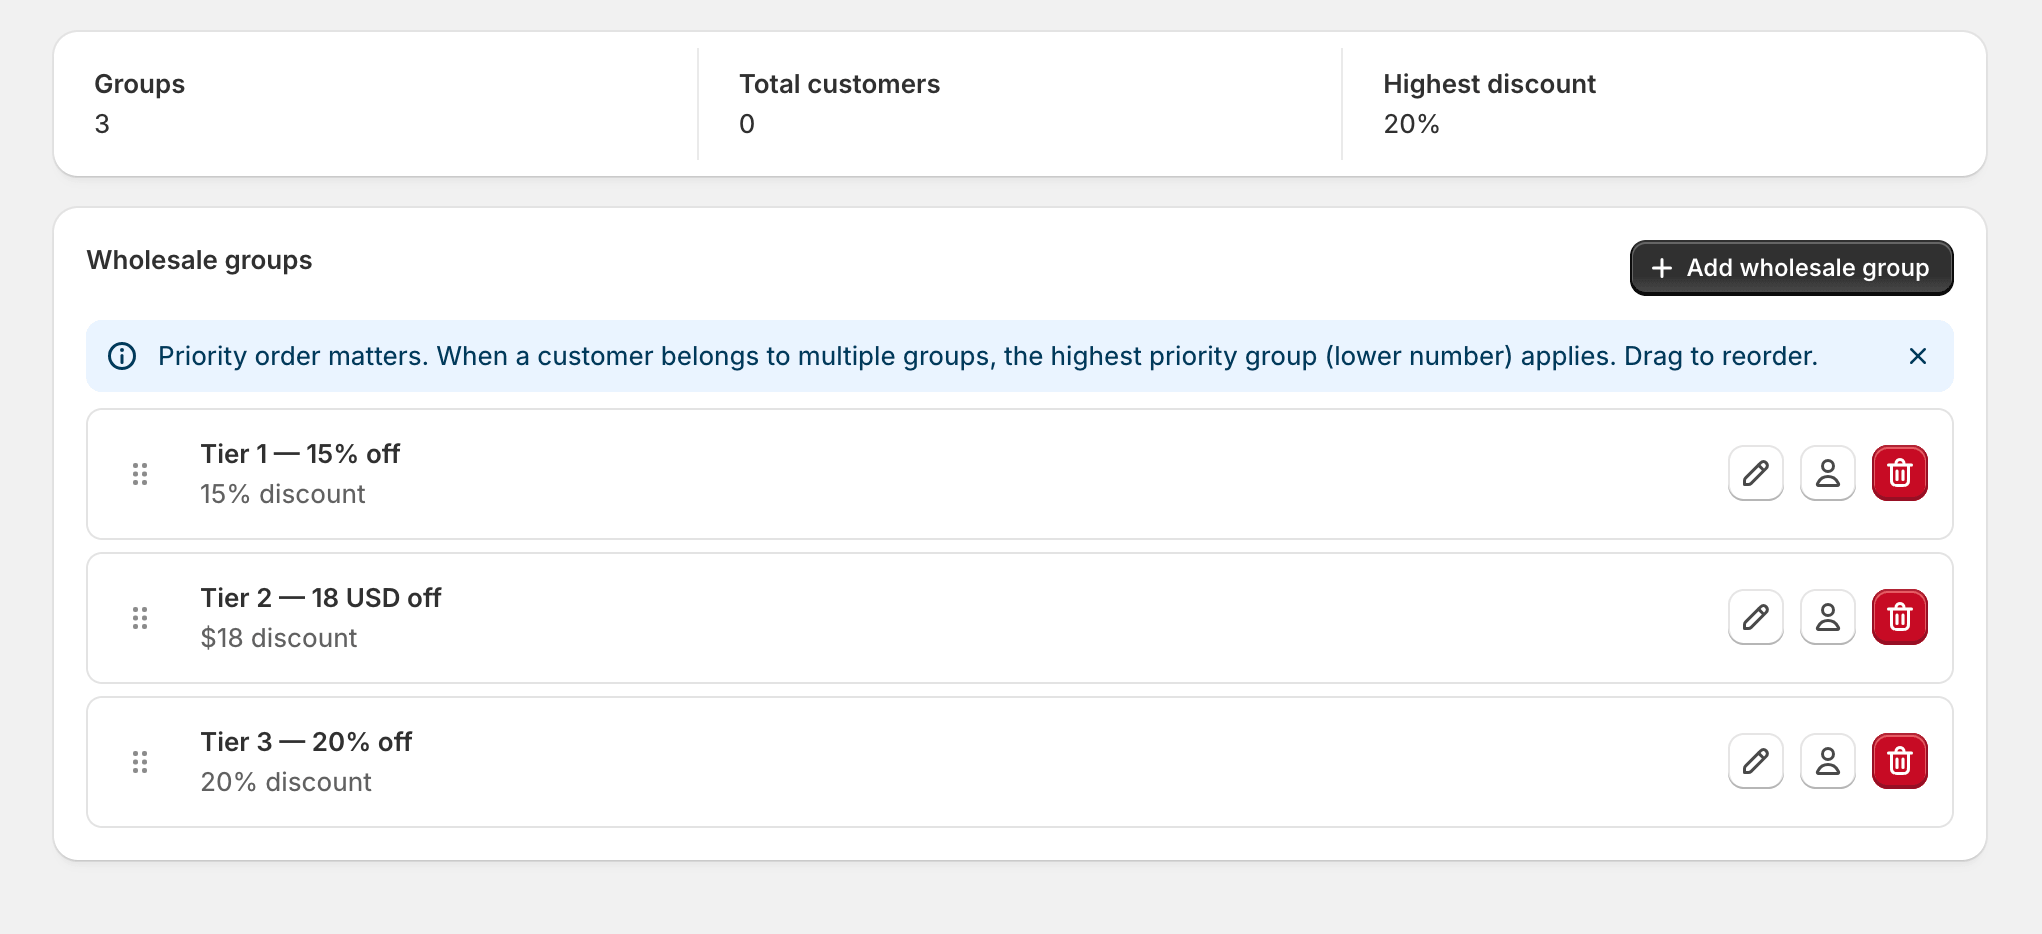
Priority
Section titled “Priority”A number — the lower it is, the higher the group ranks. The default is 0
and most stores never need to touch it. You only care about priority when
a single customer ends up tagged into two groups.
You can also reorder groups visually on the Groups page by dragging the handle on the left of each row; that updates priorities in bulk.
Auto-tag (advanced)
Section titled “Auto-tag (advanced)”The Shopify customer tag that the app applies when you add a customer to
this group. By default it’s wholesale-<slug>. You can override it in
edge cases — for example, if you have an existing vip-distributor tag
already in use elsewhere — but changing this after customers have been
added doesn’t update the existing tags. Set it once, at creation time,
and leave it alone.
Save and verify
Section titled “Save and verify”- Click Save. The modal closes and the group appears at the top of the list.
- Open Shopify admin → Customers and confirm a search for the auto-tag returns no results yet (you haven’t added anyone).
Common pitfalls
Section titled “Common pitfalls”- Two groups with the same percentage. This isn’t a bug — they just produce the same discount. But it makes it harder to reason about customer assignment later. Consolidate if you can.
- Forgetting to add a customer. A group with no members has no effect. Head to Manage Customers next.
- Setting a 100% discount as a “free for staff” group. It works, but Shopify’s gift-card and fraud-detection signals get confused. Use a proper staff discount in Shopify for that case.
What’s next
Section titled “What’s next”- Manage Customers — add buyers to the group.
- Price Rules — override prices for specific products in this group.